How To Create Data Lake In Azure

Three simple steps show you how to create Azure Data Lake Storage Gen2 data destinations for insights and analytics
Configuring an Azure Data Lake destination is quick and easy. In this post, we walk you through the steps to get a data lake configured in your Azure account.
This guide assumes you have an Azure account and understand why a data lake is a good fit for your use case. If you ask yourself, “what is a data lake?” or struggling with a “data lake vs. data warehouse” question, check out those links.
Ready to get started? Let’s go…
Three Steps To Setting Up Azure
Three primary steps align to specific resources within Azure; A Gen 2 storage account, a data lake container, and access credentials within Azure.
These three elements are needed by other systems to establish a connection to your Azure Data Lake destination securely:
- Storage Account Name
- Container Name
- Connection string
Take note of all three as you proceed through this process.
Step 1: Create a v2 Storage Account
Log into your Azure portal: https://portal.azure.com/.
To create a general-purpose v2 storage account in the Azure portal, follow these steps:
- On the Azure portal menu, select All services. In the list of resources, type Storage Accounts. As you begin typing, the list filters based on your input. Select Storage Accounts.
- On the Storage Accounts window that appears, choose Add.
- Select the subscription in which to create the storage account.
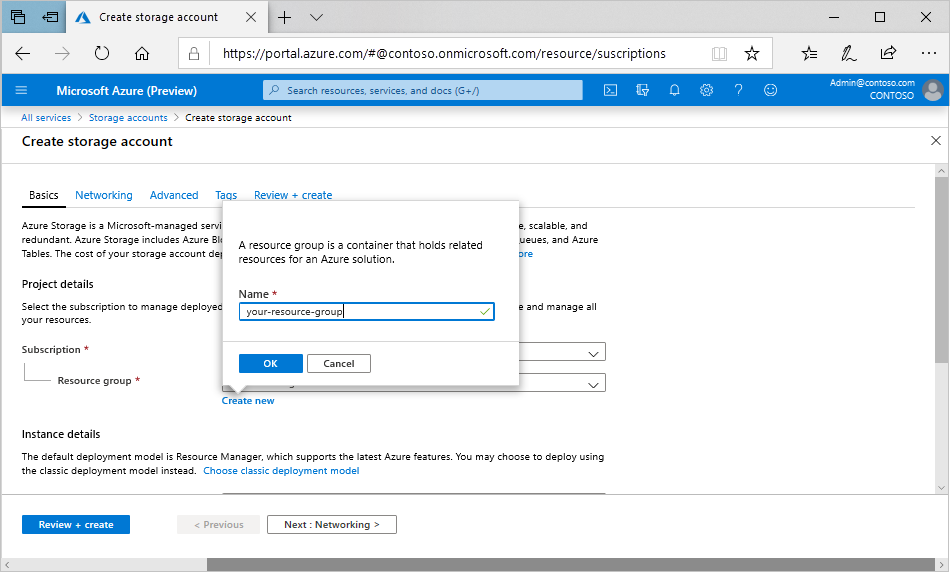
- Under the Resource group field, select Create new. Enter a name for your new resource group, as shown in the following image.
- Next, enter a name for your storage account. The name you choose must be unique across Azure. The name also must be between 3 and 24 characters in length and can include numbers and lowercase letters only.
- Select a location for your storage account, or use the default location.
- Leave these fields set to their default values:
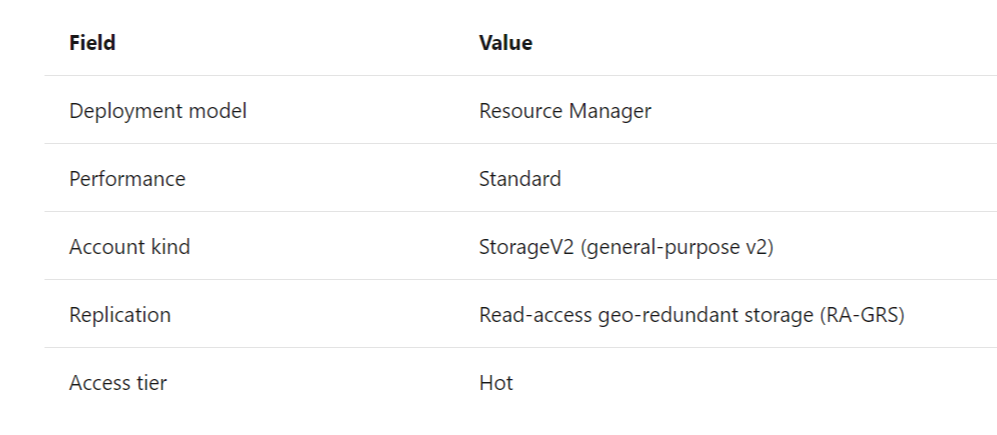
- We will be using Azure Data Lake Storage, which requires you to choose the Advanced tab, and then set the Hierarchical namespace to Enabled.
- Select Review + Create to review your storage account settings and create the account.
You just created a gen2 storage account!
Next, we need to create a data lake container.
Step 2: Create Your Data Lake Container
- Locate your newly created storage account under Storage accounts":
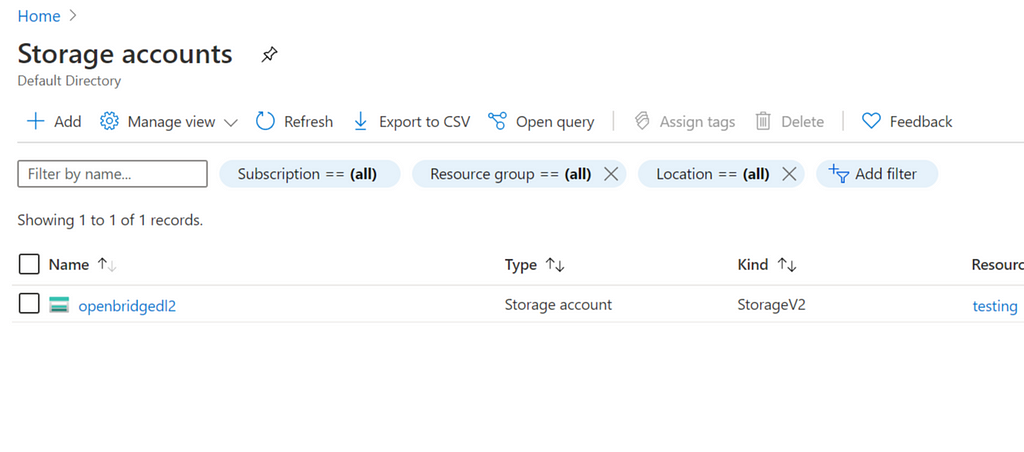
- You should see your newly created v2 storage account listed:
- Select the storage account you want to use.
- You will need to create a new container. Look for the “Containers” option in the Azure interface.
- Select Containers and then add (+) a new container and enter a name that reflects the usage. For example, openbridge-data-lake. Use a name that best reflects a name that you can identify as being used by a service like Openbridge.
- Make sure access is Private.
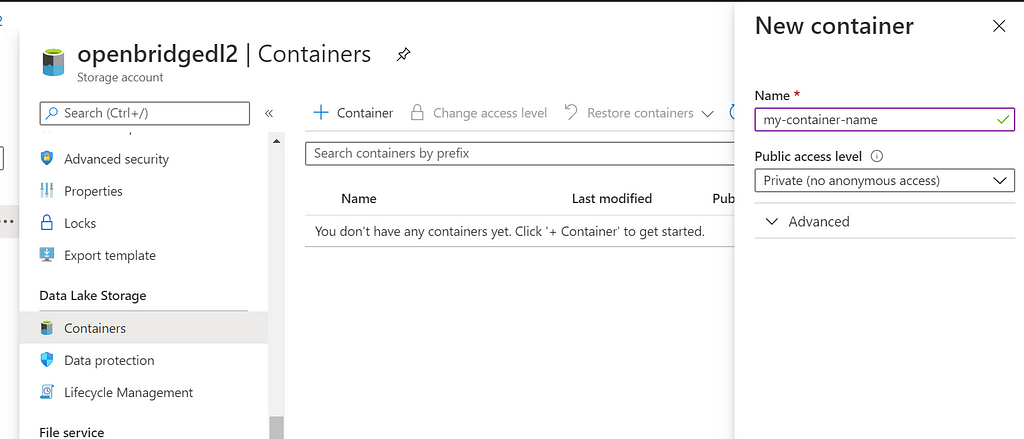
- Once you are ready, then create.
Congrats! You now have a data lake storage account and container.
Step 3: Access Authorization
The last step is getting access credentials so that you can write to your new data lake.
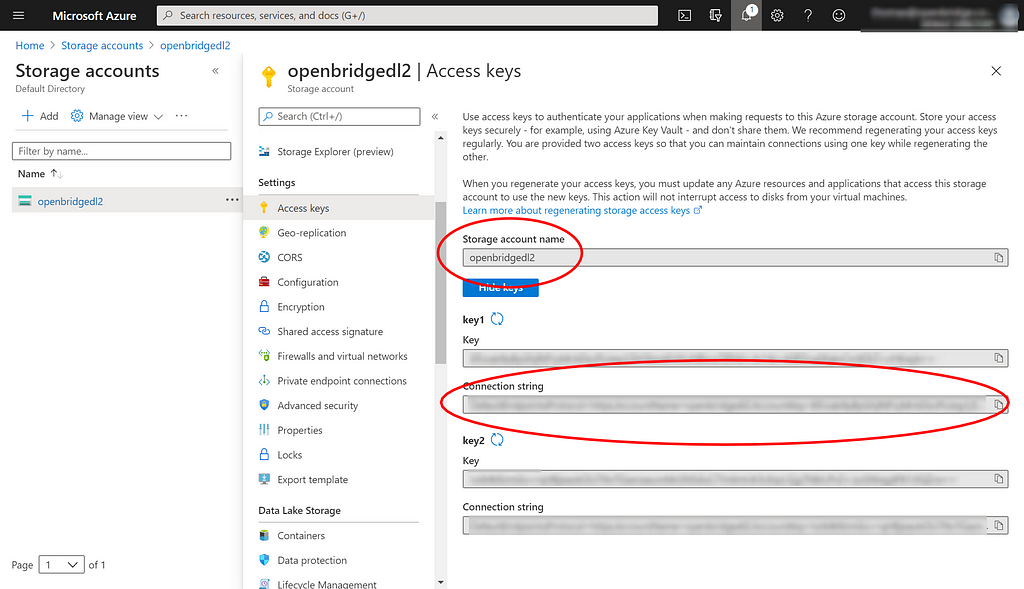
- Within your storage account, navigate to “Access Keys.”
- You will see need the Storage account name and the Connection string. Take note of each for use within applications that need access to your data lake, like Openbridge.
You are all done!
You now have a Storage Account Name, Container Name, and Connection string.
Note: As always, store your access keys securely — for example, do not share this information over email or any other insecure channel! Lastly, if you regenerate your access keys, you must update Openbnridge resources and applications that access this storage account.
Activating Azure Data Lake Destination
If you want to activate your data lake as a destination within Openbridge, we need the Storage Account Name, Container Name, and Connection string to authenticate our system to yours. This allows us to automate code-free data pipelines that follow industry and Azure data lake best practices.
The Openbridge data lake formation architecture delivers fast deployments, with surefire cost savings. Our technology, strategy, and modern data lake architecture helps businesses be agile with an on-demand, serverless data platforms like Azure Data Lake Storage, Amazon Redshift Spectrum, or Amazon Athena.
Get started with a free, 14-day trial: https://www.openbridge.com/
References
- Azure Data Lake: Fast, fully-managed ETL & ELT data ingestion to data lakes
- How To Drive Innovation With Google, AWS, Or Azure Data Lake
- Data Lakes? Big Myths About Architecture, Strategy, and Analytics
- How can I import CSV files to a data lake or data warehouse for querying?
- Cloud Data Lake Best Practices: Data Lake vs Data Warehouse
How To Create Data Lake In Azure was originally published in Openbridge on Medium, where people are continuing the conversation by highlighting and responding to this story.
source https://blog.openbridge.com/how-to-create-data-lake-in-azure-5bce1604c4c8?source=rss----4c5221789b3---4